Howdy!
I’m Dr. Bleep.
This is a beginner’s guide to what DIY synthesis is, the nomenclature and parts involved, and how to start making your own circuits.
If you want to start making ridiculous noise with your Rad-Fi kits this guide is not required but if you’re interested in taking the next step making your own electronic gizmos, this will help you get started.
You don’t need to know too much about electronics to make noise in the same way you don’t have to know chemistry and material science to paint.
Getting started
There aren’t many tools you need to start making noise.
Tools
All that’s needed for breadboard work are some wire stipper pliers like these. You can also use small pliers and diagonal cutters.
If you’re soldering check out our guide.

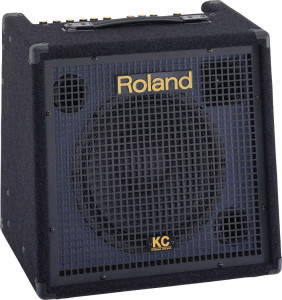
Amplifier
Most circuits need an amplifier to drive a speaker. A guitar or keyboard amp is perfect but if you don’t already have music gear lying around here are some options.
You can’t beat the cost to payoff of old, poweredcomputer speakers. Thrift shops are full of them and new ones are cheap too.
A home stereo, receiver, hi-fi, etc, can be used but aren’t recommended.
An old stereo will work fine but it’s not recomended you plug DIY nosie makers into your $400 HDMI reciever. They are meant for line level gear at low impedance so might need to be turned up very high to hear your circuit. You also run the risk of damage if you run too strong of a signal into it but if you have an old receiver you’re not worried about around go for it.
Headphones can be used but should not be connect directly to your device as they can easily blow them and your ears. Use a mixer and make sure of the level before putting them on your ears.
Make your own! Here’s the classic 386 amp circuit. It’s very easy to make, gets decently loud, and distorts nicely.
You can also start with a premade amp module like the TA2024. It sounds great and is very loud and clean. You’ll just need to wire an input and volume control and maybe a buffer.
If you have a few things you’d like to use at once and your amp only has one input, a simple mixer can be used.
Audio cables and adapters
Most amps have 1/4″ inputs. it you’re using 1/8″ on your device, you’ll need an adapter.
For the most part you won’t have to worry about stereo vs mono. Either cables will work as usually you’ll be making mono signals for mono amps.
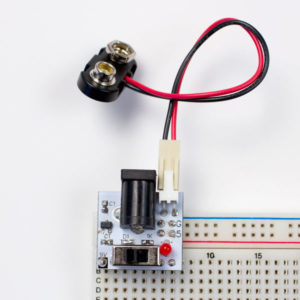
Power
AC current comes from the wall and can be dangerous . DC current from batteries and AC-DC adapters is much safer and is what’s used in DIY.
The most important thing to remember is to keep your voltages and ground goings to the correct places. Flipping them or connecting them directly to each other can heat up parts very quickly, easily to the point of burning your fingers.
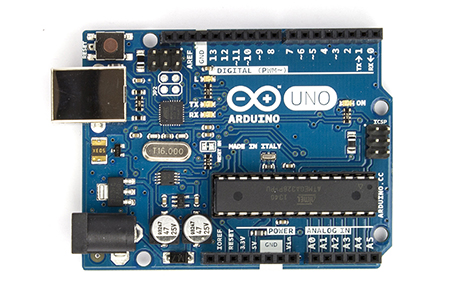
Always use the voltage indicated. An LED will almost instantly pop when given 9 Volts directly. A chip that wants 5V, like the ATMEGA328 used in Arduino projects, will be damaged by anything above 5V or if power and ground pins are flipped.
Voltage regulators are used to supply the exact voltage you need. They are easy to use as long as you connect them correctly and use the correct components indicated in the datasheet.
The Rad-Fi System uses a solid 5v regulated power supply with short circuit protection so you have one less thing to worry about.
More info on voltage and current.
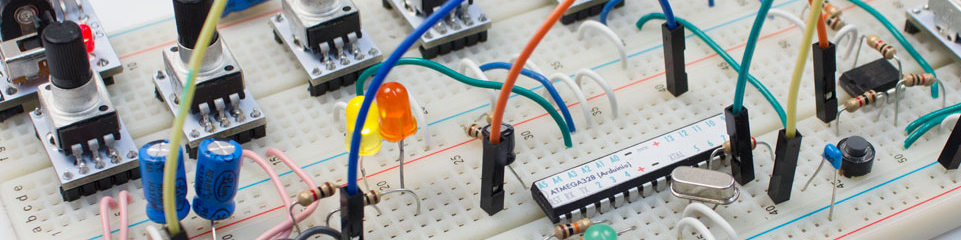
Electronic Components
Here’s an overview of some of the parts used in the Rad-Fi and other DIY kits.
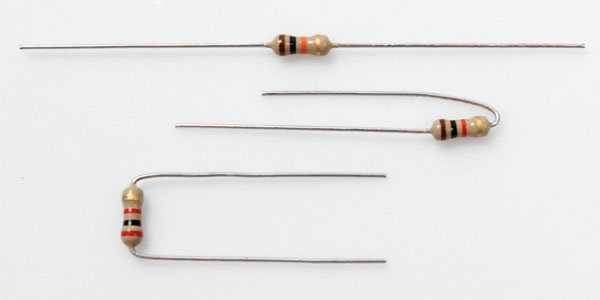
Resistors
limit the flow of current. The are measured in Ohms which are indicated by the colored stripes. You won’t have to decipher them for Rad-Fi kits but it is helpful to know how to read the color codes (or just use Wolfram to do it).
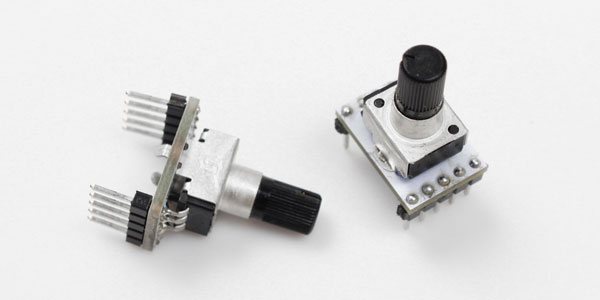
Potentiometers
are variable resistors. They increase resistance between the middle and right pins as you turn clockwise, decrease it between the middle and left, and vice versa counterclockwise.
The potentiometer has its own little circuit board to make it easy to use on a breadboard. All of the ones included with this kit are 20 kOhm.
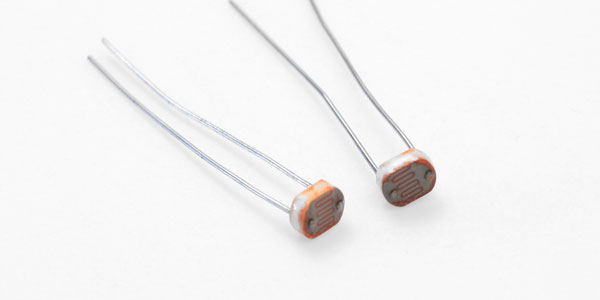
Photocells
are also variable resistors but they change based on the amount of light hitting them. More light, lower resistance.
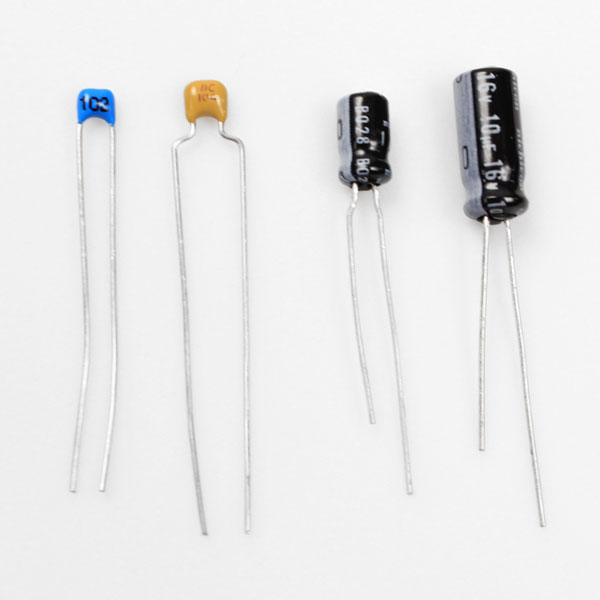
Capacitors
can store and filter current. They allow changing current to pass but not static current.
Ceramic caps, the two on the left, are non-polar meaning that they can be used in either direction. The value is marked on the side in a simple code (104 = .1 uF [microfarad]; 102 = 1 nF [nanofarad]).
Electrolytic caps, on the right, are polar with the negative side marked with a stripe and a smaller leg. The value is marked on the side directly.
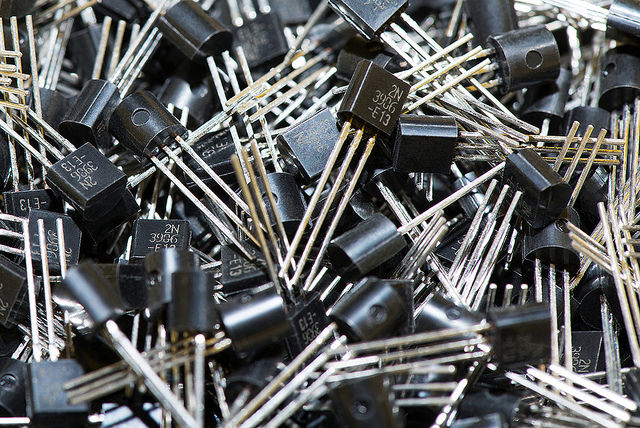
Transistors
The building block of electronics. To over simplify, they can act as switches or amplifiers. See here for an in depth explanation.
ICs aka Chips
Integrated Circuits are collections of tens to billions of transistors and other components. There a jillions of types of chips but we’ll be focusing on simple and analog ones, like the op-amp and hex schmitt trigger, and the digital ATMEGA328, the chip used by the Arduino UNO.
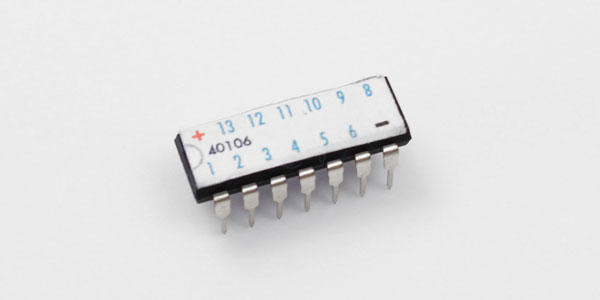
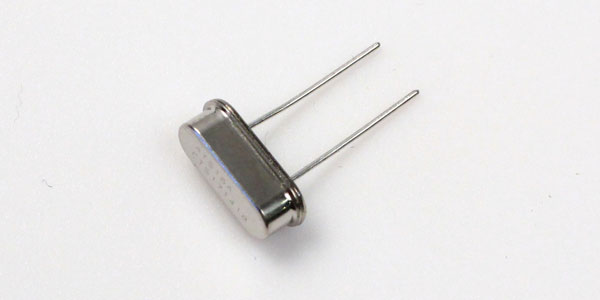
Crystal oscillator
Like the name suggests, this contains a magic crystal the oscillates at a very specific frequency. Digital chips, like the ATMEGA328 need them to run.
Diodes
Allow current can only flow through it one way but not the other.
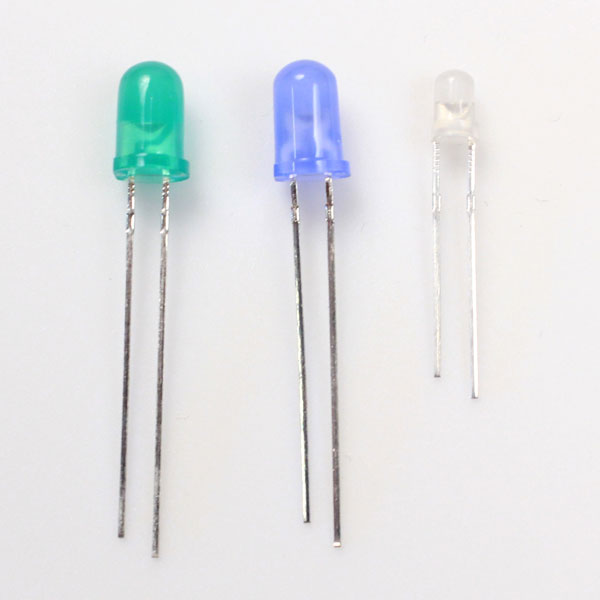
LEDs
Light Emitting Diodes produce light when current is passed through in the correct direction. Make sure not to connect them directly to the power supply as anything over their rated voltage will damage them. Like any diode, current can only flow through it one way.
The cathode or negative lead is the shorter one, also marked by the flat notch on the side of the LED itself.
Getting parts
Getting the right parts with the right values is one of the hardest things about making your own synths.
Our soldering and breadboard kits come with all the parts you need to complete them but if you’re needing something for your own creations:
Sparkfun and Adafruit both have tons of great kits with detailed guides and instructions. You can fine most components, tools and stuff you didn’t even know you wanted you’d need at either.
Jameco has some great guides by Forrest Mims and all kinds of parts too.
Mouser and Digikey have millions of parts but finding the one you need can be challenging.
Synthesizer building blocks
Oscillator
Sound waves are energry vibrating back and forth at a specific frequencey. Middle C on a piano is a wave vibrating 261.63 times a second. The volume of the soud is how far they oscillate up and down.
On a stringed instrument this happens physically. When you pluck or strike a string you can see it vibrate back and forth and vibrate waht it’s attached too, and in turn move the air around it and produce a sound.
Electronic circuits can do the same thing. Current flows through the circuit and can be made to oscillate with resitors, capacitors, transistors and other compnonts. This oscillatoing current can then be amplified and connected to a speaker to make it vibrate and produce sound.
You can think of this in the same way as a guitar’s shape and string tension poduces a specific sound. It’s just a little bit more opaque and magical with electronics.
A VCO or Voltage controlled Oscillator is a basic component of synthesis. It’s jsut and osc that changes pitch baseed on the amount of voltage coming into it. The oscillators in the Patchable synth are a kind of digital VCO. A polpular DIY analog VCO is and LM13700 OTA.
An LFO litterally means a low frequency oscillator but it’s used to describe one oscillator effecting another.
In this sample you’ll hear a sine wave change pitch, then amplitude, them be effected by a tringale wave LFO attached to pitch, then amplitude.
Waveforms
There are a 4 basic waveforms you oscillator can produce. There is infinite variation of them but it’s good to know the back types. They be audio rate oscillators of modualtars as heard here.
Filter
A filter changes an audio signal by adding or subtracing frequencies.
Here’s a low-pass and high pass filter effecting a saw tooth oscilltaor which has a ramp LFO modulating its pitch.
Amplifier
An amplifier can do make that make speakers move. The Op-Amp (operational amplifer) is a basic IC that can amplify and attenuate singals as well as filter them and create sound of it’s own.
Sequencer & Envelope
Sounds arent interesting unless that are changing. A sequencer reffers to somthing that instructs another device waht to do over time. Examples of this would be a MIDI sequencer taht sends note information and it’s grandparent, the piano roll.
An envelope is the same thing but on the micro level. It’s the sequence of pitch, filtering, or anythign else applied to a single note. This also caller an ADSR for the parts of an indiviual note event, the attack, decay, sustain, and release.
MIDI
This is a digital way of controlling synthesizers. It’s a tech that’s been arounf since the late 70s and is still integral to music. It’s a simple and powerful way to get devices, keyboards, controllers, vintage and modern synths, computers, lighing systems, etc. to communicate. It’s used in the Patchable synth and countless synths. (More in the ardunio section).
Analog / Digital
These are the two basic types of circuits. Both have thier strengts and weaknesses when maiking noise.
CMOS / Logic – A type of analog circuit DIY synths use quite a bit are logic chips, somtimes called CMOS, named after the process used to manufacture them. There are many diffent types of logic chips, each filling a very scpecic purpose. There are counters, switches, gates, etc. Think of them as mathematical operations. For the most part they put out singals that are digital, as in on or off square waves, but they are anlog devices. They are not programed or have a CPU. They are colletions of transitors and components that simple operations.
Op-Amps – These devices can amplify, oscillate or filter any signal. The are what you might think of when you think of analog, something that can be adjusted at an infintley small level with no aliasing or limitations. It can be made to produce a perfect since wave but would require a lot of fiddly circuitry.
Arduino
Arduino is an hardware and software environment for programmign a specific digital chip. It was designed as a simple way of doing complex computational tasks.
For our purposes we can focus on the fact it’s great for making complex, but lower fidelity sounds. Which isn’t a bad thing.
Like all the topics in this guide, there are much more powerful, complex, and exppensive (both in a time and monetery sense) ways of msound but you really can’t beat the cost to pay off of Arduino.
There’s a bit more to learn to get started making your own code than there is for making analog circuits but there’s so much code aviailable all you really have to know is how to use it.
See our guide for modifyling the Rad-Fi code.
Circuit Bending
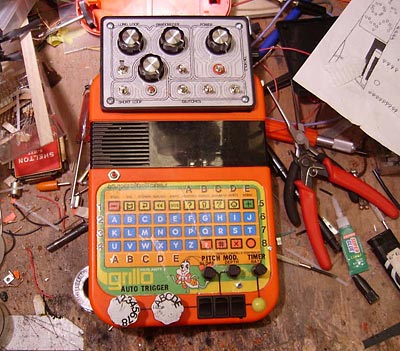
One way to get started in DIY is opening up old keyboards and music toys and poking around. It’s how I got interested in the possibility of DIY and some of the most fun you can have with a soldering iron. The basic concept is exploration.
This concept dosen’t just apply to old casios and speak&spells. DIY synths are all about trying things. It might not work or be something that makes sense to an engineer but it might make something awesome happen. Or you might blow up your firby.
More resources
Forrest Mims Engineer’s Notebook – Mims’s books are the doorway into DIY electronics for a lot of people since the 70s.
He invented the stepped tone generator, aka the atari punk console, one of the most popular noise kits, he’s still active and we’re still drawing inspiration from his writings.
Craig Anderton’s Electronic Projects for Musicians is another classic.
Hackaday’s “Books you should read: Basic electronics”
Also check out these pages:
MFOS
Beavis Audio
Nicolas Collins
Eric Archer
Mutable
Doepfer A-100 DIY
Hackaday’s “Logic Noise” series.
little-scale
Let’s make noise!
See the analog guide to make your first 40106 oscillator.
If you have any question of comments regarding this (evolving) guide, leave us message on theFacebook user group, tweet at or email us.